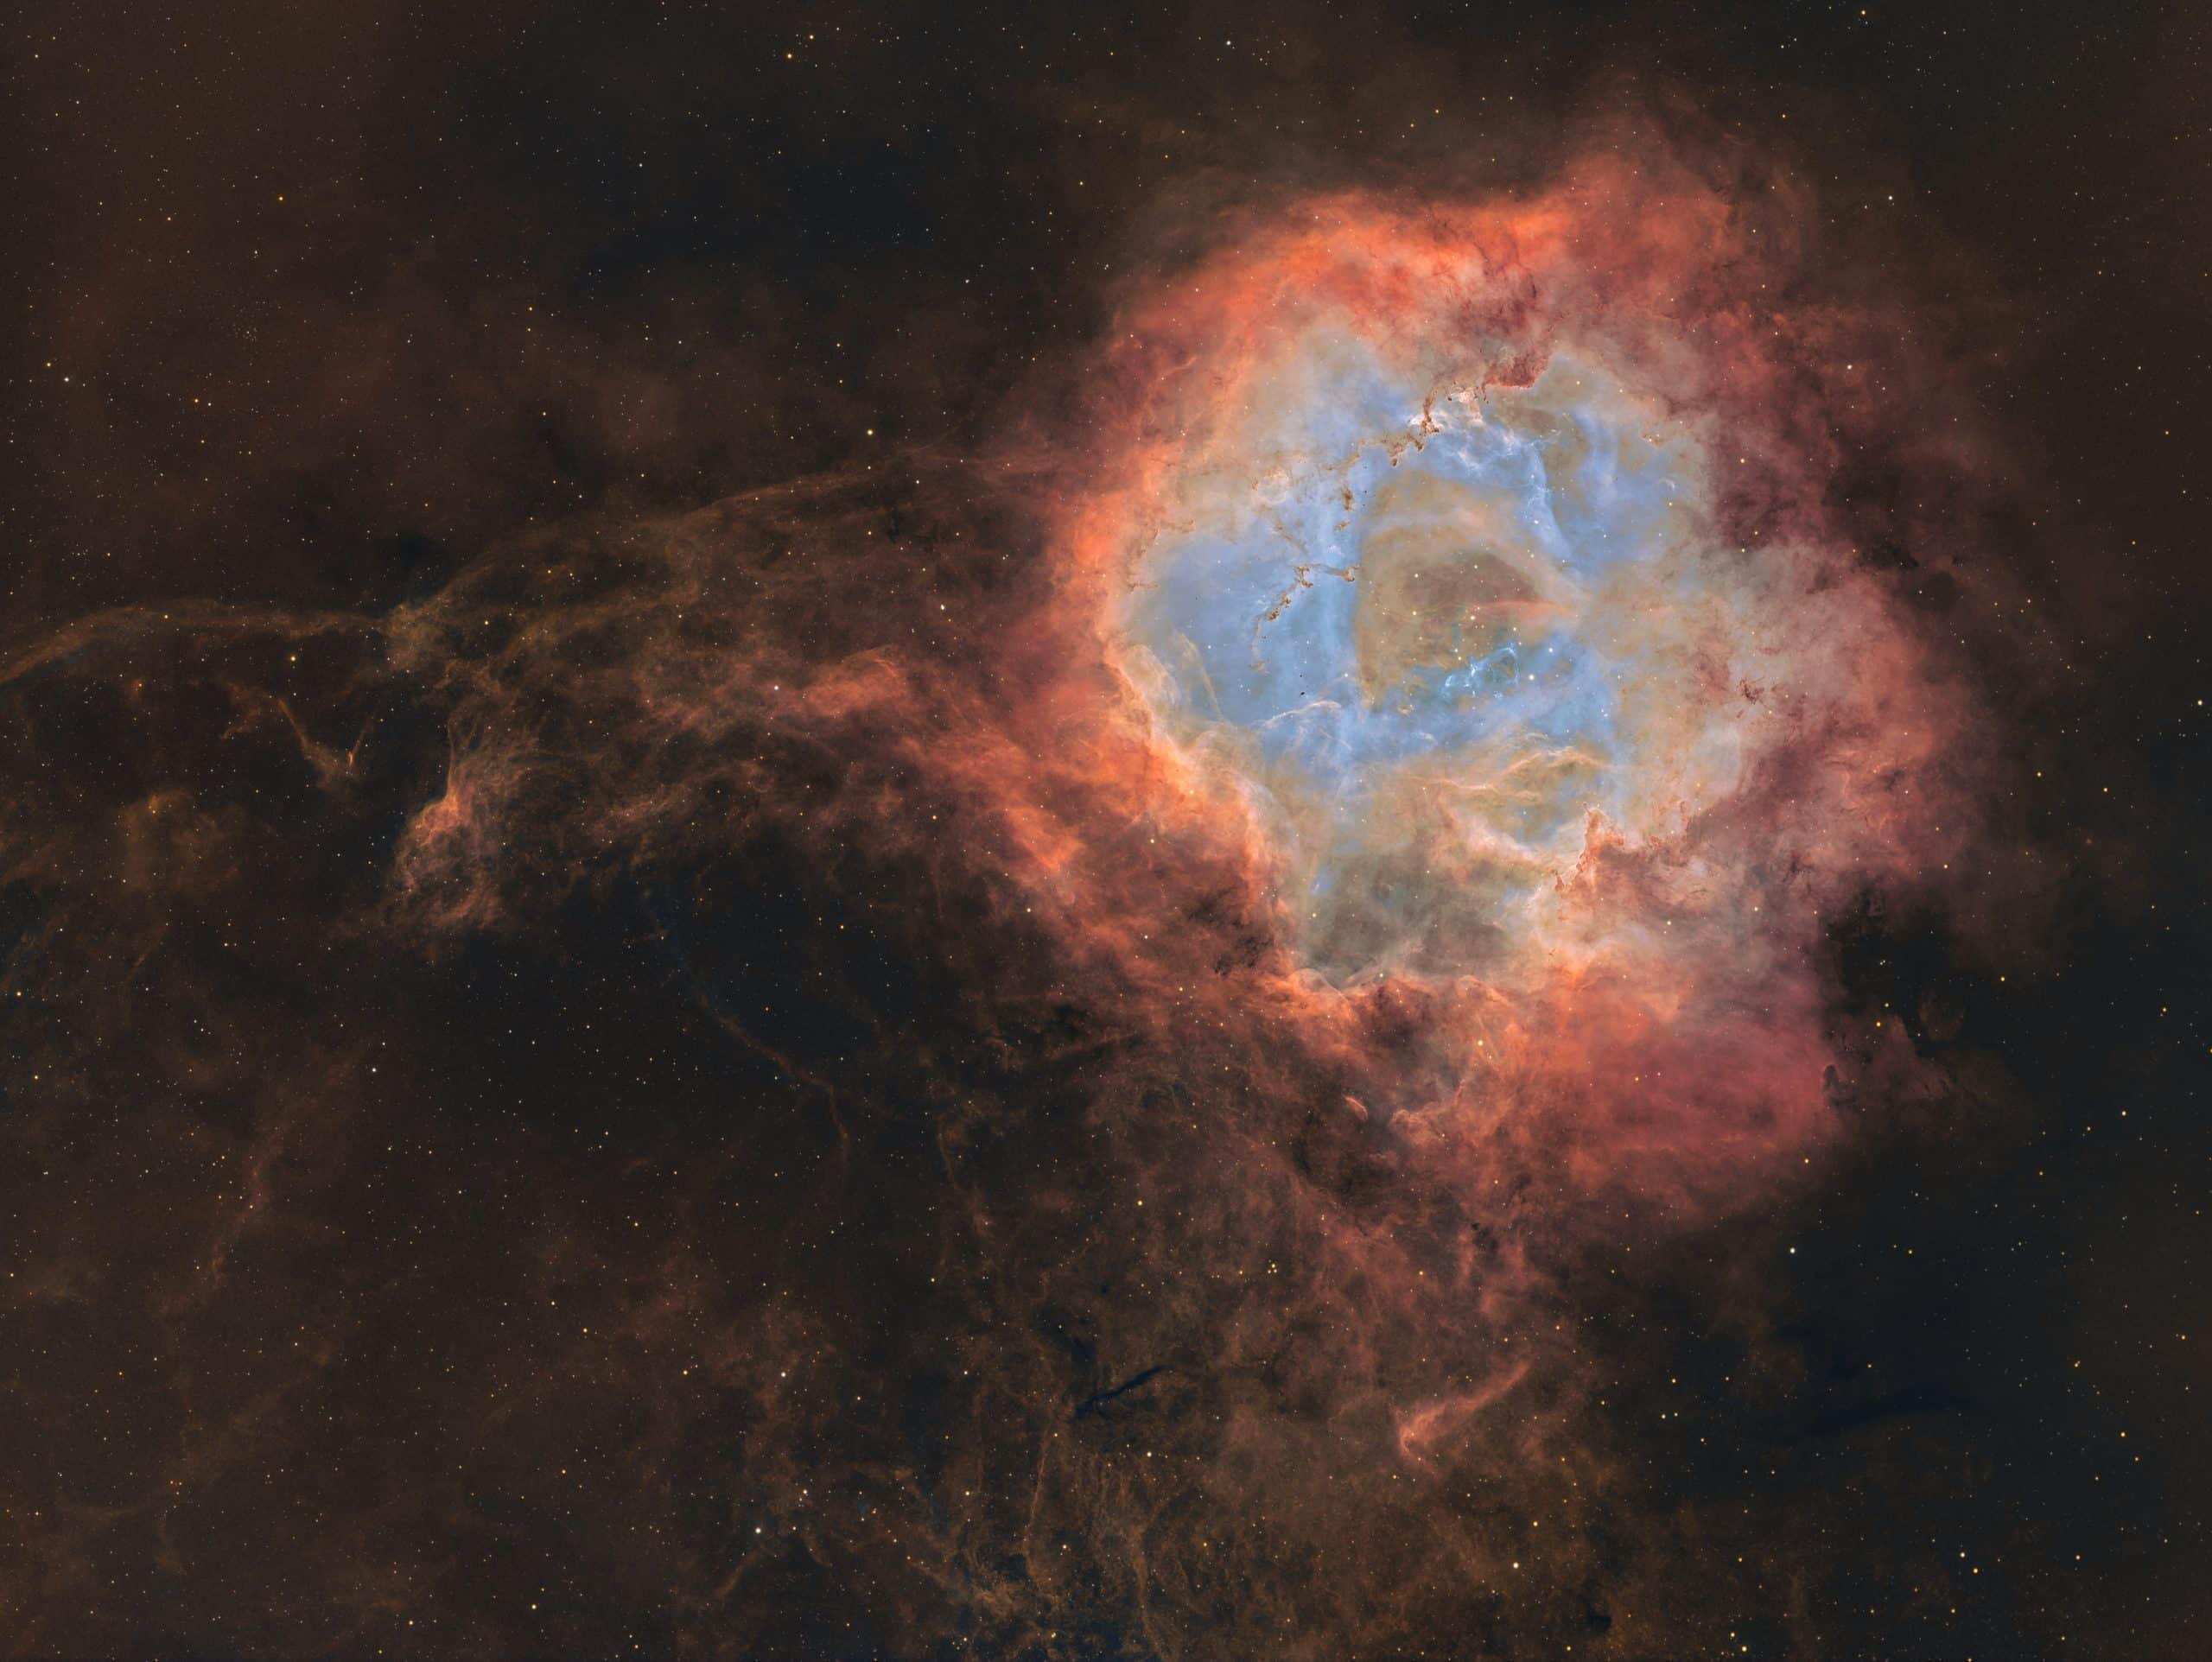
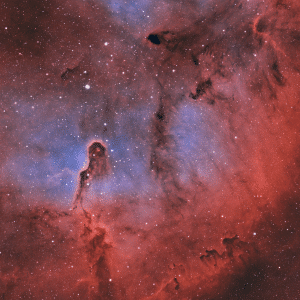
First light: La Rosette in SHO from my rooftop in the middle of the city
That's it, my first image is out! 🎉
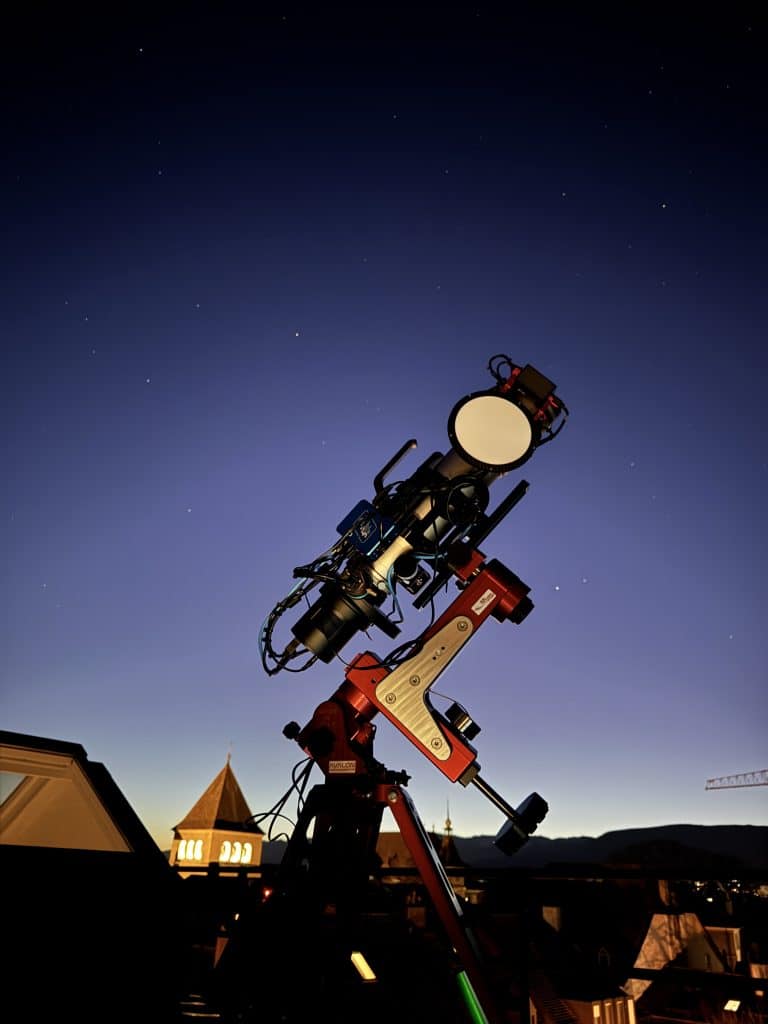
Those of you who follow me will know that I was setting up a new setup with a rather crazy brief: to shoot deep sky (and especially extended nebulae) from the sloping roof of my building, right in the center of town. The constraints were heavy: light pollution, difficult access, cables to manage... I needed something reliable and optimized.
Here is the result of this baptism of fire on the Rosette nebula.
Le Matos: Why these choices?
The idea was to maximize the signal while minimizing the hassle. Here's the titular team:
Optics : SQA85 (the sharpness is there).
Camera : ToupTek SkyEye62AM (the famous IMX455 sensor, a monster).
Frame : Avalon M-Zero.
I'll stop for two seconds on the Avalon. It's the real game changer of this configuration. Why is that? No meridian reversal.
In astrophotography, one less hassle is a victory. When you're shooting from a rooftop in fickle weather, not having to keep an eye on the meridian flip or cable management at 2am changes your life. You sleep better, and the bullies pile in.
Target and acquisition: «Bourrin Mode» activated
To test the beast, I took the classic Rosette. I wanted a well-known reference to judge signal quality.
I launched the acquisitions without thinking too much, in «photon vacuum cleaner» mode as soon as there was a hole in the clouds. Inevitably, I had a lot of garbage to throw away, but in the end, I came out with my personal integration record: 25 hours laying time.
Hα : 35 x 600s
OIII : 50 x 600s
SII : 64 x 600s
(2.5nm filters)
The verdict on the signal?
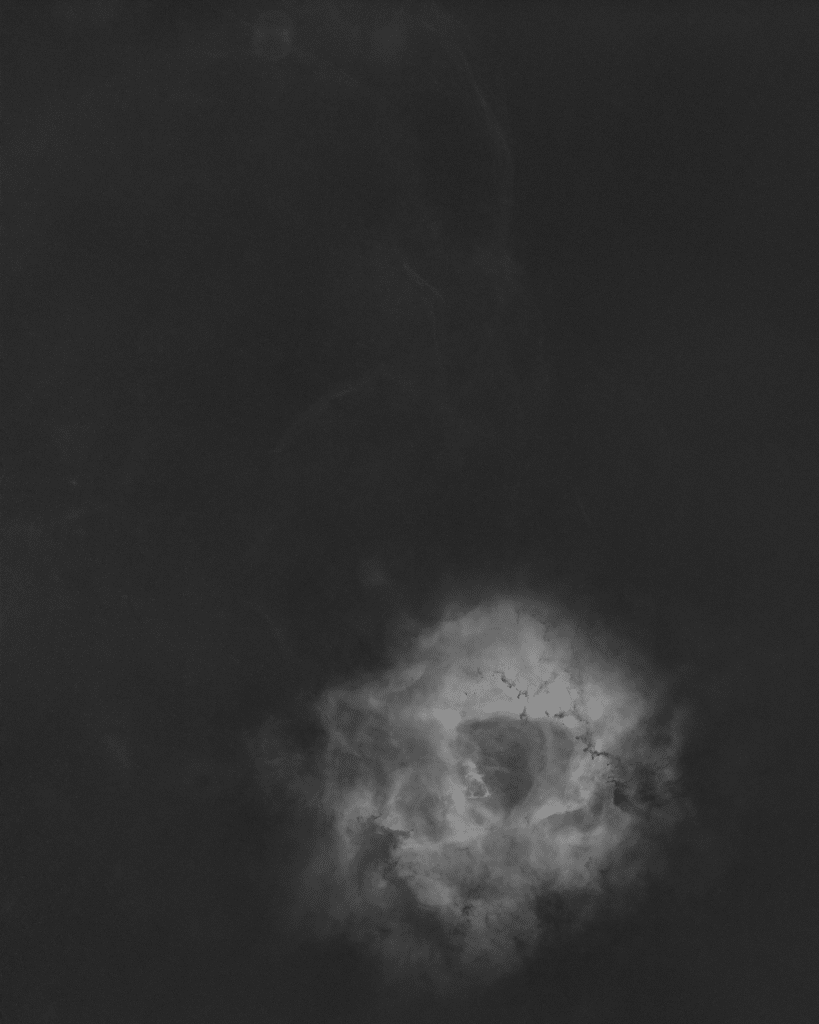
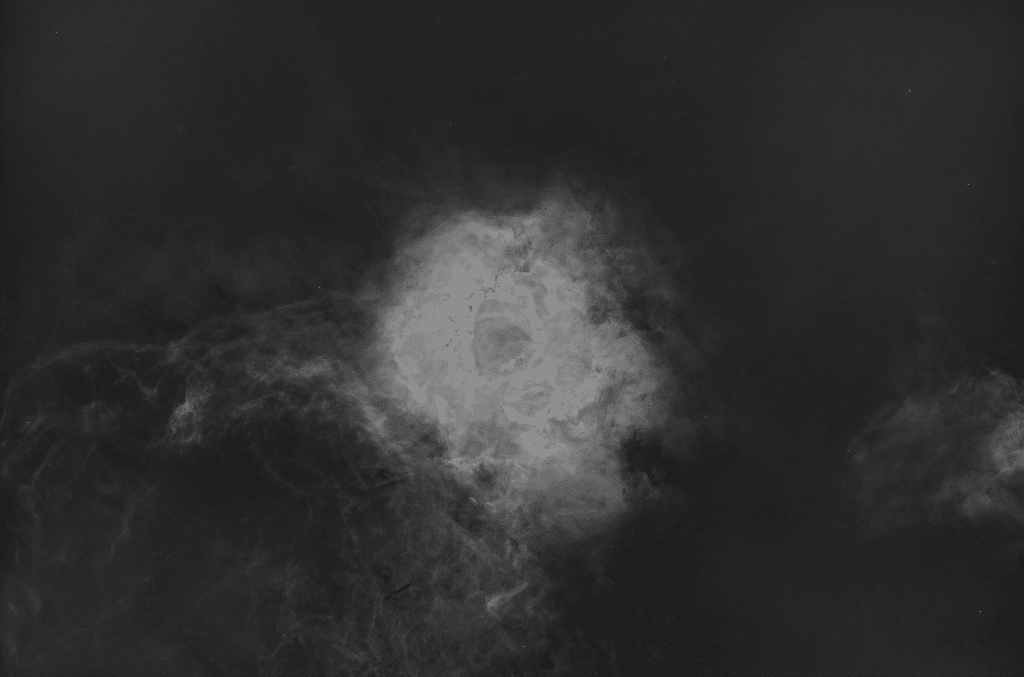
In Hα (on the right), unsurprisingly, there's a lot going on. In OIII (middle), the heart is very rich. But the real slap in the face is SII (left). I wasn't expecting so many weak extensions from the city. This is where the processing challenge began: how to make this SII pop without massacring the image balance?
My Workflow:
1. Cleaning (Linear)
WBPP to stack it all up. Automatic DBE (Seti Astro's script) layer by layer. It's crucial to fire the gradient before touching anything else.
Then, the holy trinity in linear :
BlurXTerminator (for sharpening)
NoiseXTerminator (ciao noise)
StarXTerminator (we fire the stars)
Note for later: I'd like to test a slight rise with MAS before to remove the stars, it seems to help the algo on dense areas.
2. Creating the HOO
I mount the Hα and OIII histo with MAS (sky background around 0.2).
Assembly via Perfect Palette Picker, then Narrowband Normalization in pure HOO mode (Blend Amount at 0).
A little HDR and NoiseX to clean up the structures.
3. The sinews of war: IBS
This is where it all comes in. I treated the SII layer separately (BlurX/NoiseX/StarX). I stretched it with MAS, keeping the sky background very dark so as to retain only the details.
Next, colors are blended with NB Colour Mapper (Hue 47, Saturation 0.75) and progressively merged into the HOO mix via ImageBlend.
4. Finishing (Photoshop & Pix)
Photoshop to play with curves, micro-contrast and saturation. The aim is to respect the weak extensions without making it «cartoony».
Back to Pix to reset the stars (NB to RGB Star Combination).
The downside: Let's talk about the Tilt 📐
Let's be honest: if you zoom in on the corners, you'll see that it pulls a little. There's some tilt.
The SkyEye camera has an adjustment ring, but adjusting it by hand on a rooftop is hell. I'm seriously eyeing Wanderer Astro's Electronic Tilt Adjuster to automate this. If I fall for it, I'll let you know.
The last word
This image validates the concept of making narrowband from a city center, it's possible. The Avalon does the job in terms of stability, and the SII signal is an excellent surprise.
If you want to have fun, I invite you to download my calibrated images (link below) and try your own treatment. It's always instructive to see how others interpret the same data.
To provide the best experiences, we use technologies such as cookies to store and/or access device information. Consenting to these technologies will allow us to process data such as browsing behavior or unique IDs on this site. Failure to consent or withdrawal of consent may adversely affect certain features and functions.
Functional
Always active
Storage or technical access is strictly necessary for the legitimate purpose of enabling the use of a specific service explicitly requested by the subscriber or user, or for the sole purpose of transmitting a communication over an electronic communications network.
Preferences
Storage or technical access is necessary for the legitimate purpose of storing preferences not requested by the subscriber or user.
Statistics
Storage or technical access used exclusively for statistical purposes.Storage or technical access which is used exclusively for anonymous statistical purposes. In the absence of a subpoena, voluntary compliance by your Internet service provider or additional third-party records, information stored or retrieved for this sole purpose generally cannot be used to identify you.
Marketing
Storage or technical access is necessary to create user profiles in order to send advertisements, or to track the user on a website or on several websites with similar marketing purposes.