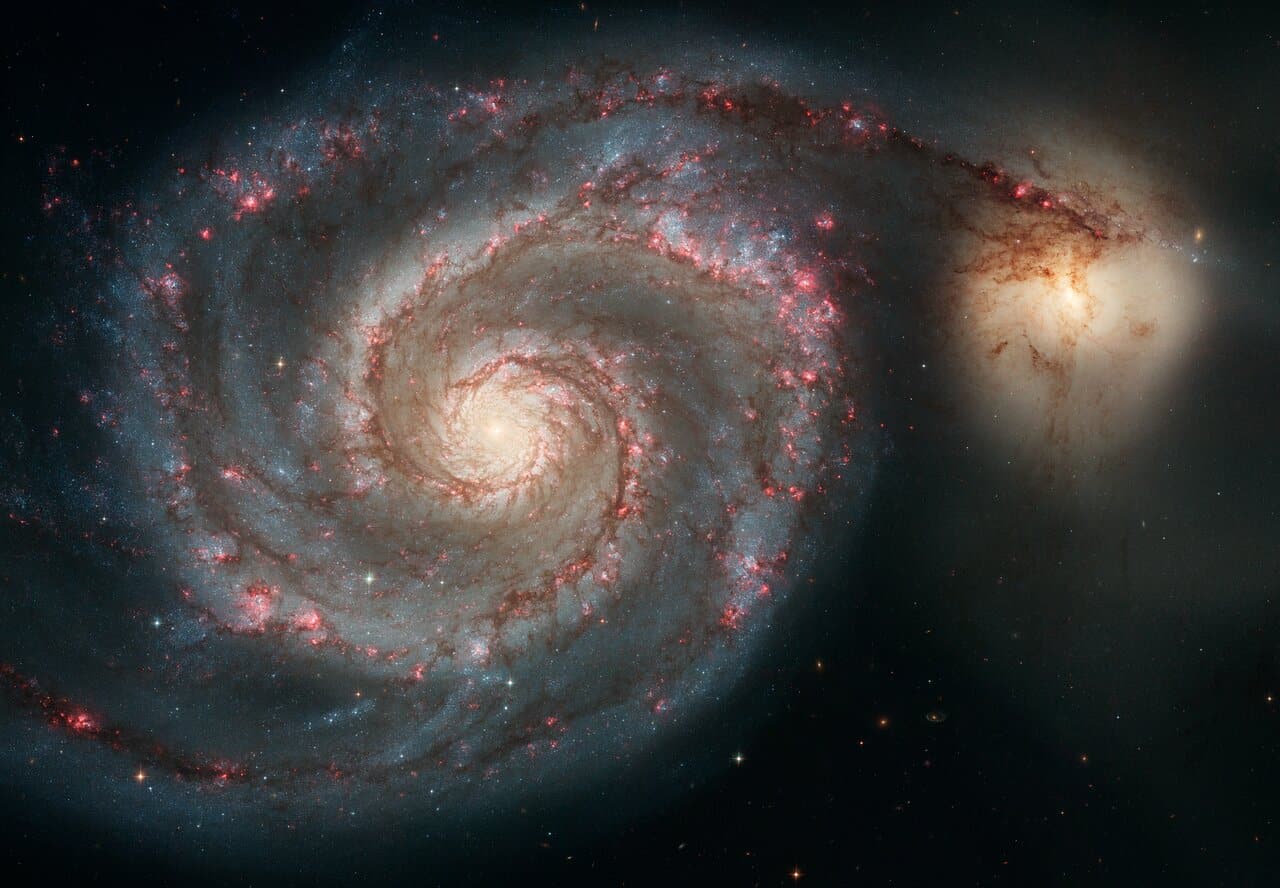
A monochrome camera can produce beautiful color images. To do this, you photograph the same object through several filters and then combine the resulting images. With an additional luminance layer, you can adjust the details and colors separately: this is the principle behind LRGB processing.
In this tutorial, you'll combine your red, green, and blue layers, create a simple mask to retouch a galaxy without altering the entire sky, and then add luminance.
Understanding Where Color Comes From
The monochrome camera measures the amount of light for each pixel. The filter placed in front of it determines which part of the spectrum is captured.
With a red filter, you get a grayscale image that represents the light received in the red spectrum. The same principle applies to green and blue filters. The software then assigns each image to the corresponding channel.
- R (red): provides the red channel
- G (green): provides the green channel
- B (blue): provides the blue channel
- L (luminance): produces a bright, highly detailed image, provided the images are of good quality
R + G + B already produce a color image. The L channel then completes the result. A single monochrome image taken without filters is not enough to reproduce the object’s true colors. NASA illustrates this principle with a composition created using three filters.
1. Prepare the four source images
To follow this tutorial, you'll need PixInsight and four images of the same field: L, R, G, and B.
These images must already have been calibrated and stacked separately for each filter. They are called "masters." Acquisition and stacking are preliminary steps: you take multiple exposures for each filter, then combine them to improve the signal-to-noise ratio.
Before assembly, check the following three items:
- The stars overlap. If necessary, align the masters using StarAlignment, using a common reference.
- The dimensions and framing are identical. Crop all layers in the same way to remove unusable edges. If your color images were taken using 2-bin binning and the luminance image was taken using 1-bin binning, they must be rescaled to the same size and properly aligned.
- The sky background does not show a steep gradient. Correction using DynamicBackgroundExtraction or AutomaticBackgroundExtractor may be necessary. Flats primarily correct vignetting and dust; they do not always replace sky gradient correction.
Keep the original masters and work on copies. The importance of alignment, common framing, and preparing the sky background is also explained in the Official Siril Tutorial on RGB Composition.
2. Assemble the red, green, and blue layers
Open your four masters in PixInsight. To identify them easily, name them master_R, master_G, master_B, and master_L.
Open LRGBCombination, reset its settings, and then:
- Uncheck L to keep only the three color channels.
- Assign master_R to channel R.
- Assign master_G to channel G.
- Assign master_B to channel B.
- Run the process globally to create a new image.
You'll get your first RGB image. A color cast or a very dark appearance at this stage doesn't mean the stacking has failed: you still need to calibrate the colors and make the weak signals visible.
3. Calibrate colors before retouching
Use PhotometricColorCalibration, or PCC. This tool uses stars in the field and catalog references to balance the channels.
Work on the RGB image while it is still linear—that is, before any stretching is actually applied to the pixels. Enter the field coordinates, focal length, and pixel size requested by the tool. These values must match the image being processed, especially if it comes from a binning acquisition. Start the process and verify that it completes without errors. The PCC Tutorial by Alejandro Tombolini specifies this linearity requirement.
If an unwanted green cast remains, SCNR can help: select “Green,” set the protection to “Average Neutral,” and then compare the before-and-after results by adjusting the “Amount.” This correction is optional; applying the maximum value automatically may remove too much color. The SCNR Guide by Jon Rista describes how to use it after calibration.
4. Bring out the details by stretching the image
In PixInsight, ScreenTransferFunction (STF) allows you to view a dark image without altering its pixels. An STF preview, therefore, does not involve any stretching that is saved in the image.
For a simple first try:
- Display your RGB using automatic STF, keeping the RGB channels linked after calibration.
- Open HistogramTransformation.
- Drag the STF new instance triangle onto the bottom bar of HistogramTransformation to transfer the settings.
- Turn off the STF display, then apply HistogramTransformation to the RGB image.
- Check the result. If the center becomes too white or the slight distortions disappear, undo the change and choose a gentler stretch.
Perform this step separately on layer L. Both images must have consistent brightness before they are finally merged. The STF transfer to the histogram is explained in the PixInsight Resources Getting Started Guide.
5. Create a simple mask for the galaxy
A mask tells the software where to apply an adjustment. Imagine a stencil with smooth edges:
- White : The treatment applies in full
- Black : The area is protected
- Gray : The treatment applies only in part
To enhance the colors of the galaxy while preserving the sky background, look for a mask that shows the galaxy in light tones and the sky in dark tones.
Select your stretched RGB channel, then open RangeSelection. Reset its settings, check the "Lightness" box, and open the real-time preview.
- Set "Upper limit" to 1, with "Invert," "Link range limits," and "Screening" unchecked.
- Gradually adjust the "Lower limit" to remove the sky background while preserving the galaxy's arms.
- Adjust the "Fuzziness" setting to make the selection less sharp.
- Adjust the "Smoothness" setting to soften the edges.
- Generate the mask when the selection is appropriate.
If only the nucleus and a few stars remain bright, your selection is too restrictive to retouch the arms. If a large area of the sky becomes bright around the galaxy, the selection is too wide. There is no universal value: the correct setting depends on your image and its stretching.
Bright stars can also be selected. This first mask does not perfectly isolate the galaxy, but it does provide a good starting point for understanding and practicing local retouching. To learn more about the settings, see the section on masks in the Tutorial by Richard Beauregard.
6. Apply the mask and enhance the colors
Select the RGB image, then go to Mask > Select Mask and choose the mask you created. Make sure it is selected.
In the default view, a red overlay shows the protected areas. To see the actual colors, turn off "Show Mask." The mask remains active: hiding it from view and disabling its protection are two different actions. The mask management commands are detailed by Alejandro Tombolini.
Now open CurvesTransformation:
- Turn on real-time preview.
- Select S, which stands for saturation.
- Place a dot near the middle of the diagonal and shift it up slightly.
- Observe the galaxy, the stars, and how they blend into the sky.
- Apply it if you're satisfied with the result.
Start with a small adjustment. You can add more color to the arms without making the noise in the sky background much more noticeable. Before making another adjustment, reset the curve to avoid unintentionally repeating the same setting.
7. Invert the mask to work on the sky
Select Mask > Invert Mask. Temporarily display the overlay again: the galaxy should now be more masked, and the sky background more visible.
With CurvesTransformation, you can gently reduce the saturation of the sky if any colored spots remain: select S and lower the curve slightly. To darken the sky, select RGB/K instead and lower a midpoint very slightly. Compare the preview before applying each adjustment.
The goal is to achieve a uniform background while preserving the faint details. Avoid pushing it to absolute black: this can cause useful signal to be lost and create a visible transition around the galaxy.
After making this adjustment, use Mask > Remove Mask to prepare for the next steps.
8. Add luminance to restore details
A convolution can smooth the RGB image before adding the L channel. This step can help reduce certain color artifacts, but it is optional. To try it out, apply a slight convolution to a copy of the RGB channel, without an active mask. Then check to make sure the stack doesn’t create colored halos around the stars.
To combine luminance with colors:
- Open LRGBCombination and reset its settings.
- Check only "L," then select your preset luminance.
- Uncheck R, G, and B.
- This time, apply the process to the existing RGB image.
Compare the result to the RGB-only image. The luminance should add detail without making the colors appear excessively pale. If necessary, adjust the brightness balance between L and RGB, then try using a lower L value. This application method is described by Juan Conejero on the PixInsight Forum.
Check and save the image
Look at the entire image, then examine a few areas at 100% magnification: the galaxy’s core, the faint arms, and the bright stars. A colored border may indicate misalignment; a halo around the galaxy may result from a mask that is too steep or a correction that is too strong.
Keep a working copy in PixInsight. To continue editing elsewhere, export a copy as a 16-bit TIFF. For the blog, prepare a resized JPEG version, converted to sRGB for standard web display.
Your first goal is to achieve a clear image, balanced colors, and subtle transitions. Save this version before attempting any further adjustments: it will serve as a reference point for determining whether each adjustment actually improves the image.
Sources : PCC Tutorial – Alejandro Tombolini ; SCNR Guide – Jon Rista ; Getting Started Guide – PixInsight Resources ; Tutorial on Masks – Richard Beauregard ; RGB Composition Tutorial – Siril ; PixInsight Forum – Juan Conejero
See also on Deep Space Astronomy: Deconvolution in Astronomy: From Hubble to BlurXTerminator ; Player One Astronomy
Signature: CBurkhalter