For years, with my old CCD and its small 11×11 mm sensor, I didn't ask myself too many questions. I'd shoot as many exposures as possible, throw it all into integration, and leave PixInsight to clean up afterwards. A few corrections here, a little gradient there - I was good to go.
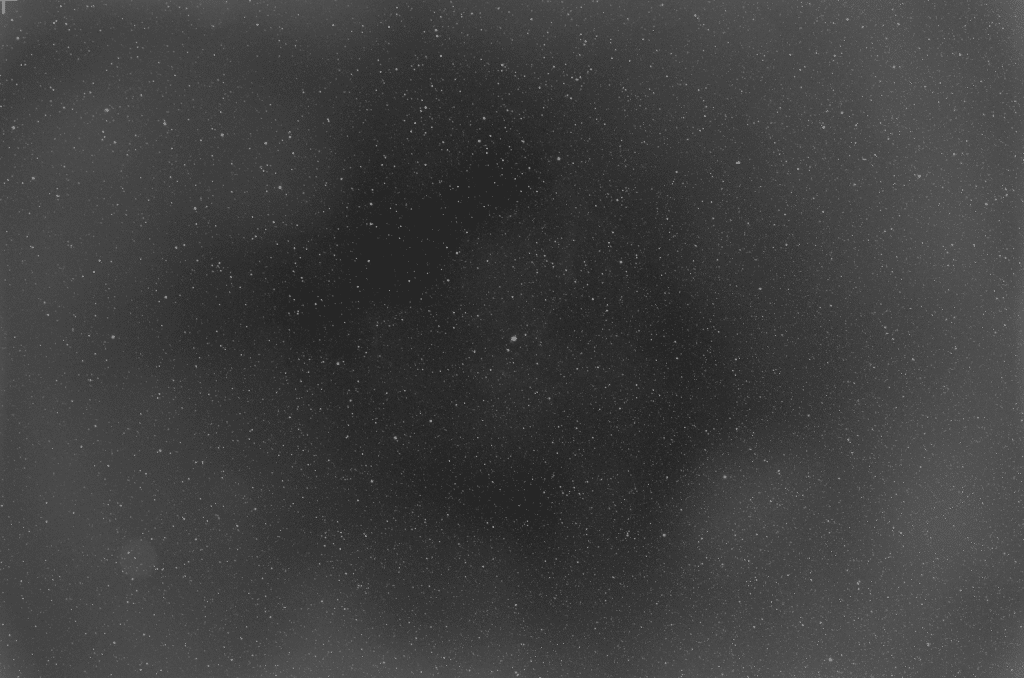
And then I changed sensors. And so I got this kind of thing after calibration with the flats:
Since I switched to an IMX455 - a full-frame sensor, and therefore considerably larger - the situation has completely changed. Optical distortions are more visible, vignetting more pronounced, dust more treacherous. Since the idea is to avoid cropping and exploit the entire field of view, it's important to take care with calibration. And that's when I began to delve into a subject that many people skim over: dark-flats.
Because yes, if your flats are over-correcting or under-correcting your images - edges too bright, weird halos, badly erased dust - there's a good chance that's where the problem lies.
First, the technique
What a raw flat really contains
There's a tendency to think of a flat as just «a photo of vignetting and dust». In reality, a raw flat also contains the following components additives related to the camera's electronics.
If we schematize what a pixel of raw flat represents :
Illumination your flat source, vignetting, dust shadows
Spatial gain (PRNU) pixel-to-pixel non-uniformity, that fixed «texture» specific to each sensor
Offset/bias an artificial level added by electronics, a kind of floor.
The dark of installation thermal signal accumulated over the duration of the flat (yes, even on a short exposure)
What we want to keep in our master flat is the multiplicative vignetting, dust, PRNU. What we want to get rid of before standardizing is everything else - the additive.
Why it's a problem if you don't remove it
In simple terms, calibration by flat means dividing your lights by the flat. If your flat still contains additive, you divide by something «wrong». Instead of dividing by the multiplicative alone, you divide by multiplicative + additive.
And that's exactly what happens:
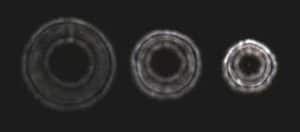
over- or under-correction of vignetting (edges too light or too dark)
halos or rings after gradient extraction
dust that can't be corrected easily
sometimes a pattern that is printed in the final image
Bias or dark-flat: what's the difference?
Visit bias essentially measures offset and read noise, with minimum exposure time. The dark-flat, offset + dark + patterns at the same exposure time as your flats.
In concrete terms :
If your flats are very short, the thermal signal accumulated during the exposure is almost non-existent - the bias may suffice.
If your flats are 0.2s, 1s, 3s or longer (which happens quickly with narrowband filters or a slightly dimmed panel), the dark exposure is no longer negligible. And that's when dark-flat really comes into its own.
The case of CMOS sensors
On many modern CMOS, offset is sometimes sensitive to settings, fixed patterns (light banding, dithering), and even weak signatures in short exposures. Dark-flat has the advantage of «sticking» exactly to the conditions of your flats: same gain, same offset, same temperature, same duration. It therefore removes precisely what your flats should not contain.
A «clean» flat is ideally built like this: subtract a master dark-flat (or bias), normalize, then use in division. That's all there is to it. But it's this «everything» that changes the quality of the calibration.
The simple version
Imagine that your flat is a card that says: here the image is darker due to vignetting, here there's dust, here the sensor is a little more sensitive.
Except that your raw flat isn't just this card. There's also a little gray haze added by the camera's electronics. The dark-flat is the photo of this gray veil, taken under the same conditions as the flat. When you do flat - dark-flat, you remove this veil. And only then can you use the flat as a reliable correction card.
Without it, you're using a «polluted» map. And when you divide your images by this map, you run the risk of creating wobbly corrections.
In a nutshell: dark-flat is used to clean up your flat, so that the flat contains only what it needs to correct.
How to make it part of your routine
When to make dark-flats?
Every time you make flats, ideally. The dark-flats should match the flats' exposure time, gain, offset, temperature, sensor mode and binning. If you change the duration of your flats (because you change filter or panel brightness), you need a corresponding set of dark-flats.
How much?
30 flats + 30 dark-flats is a very good standard. You can go up to 50 if you have the patience, but 30 already does the job very well.
Flow in the field
At the end of the session (or the beginning, whatever)
Install your flat source (sign, T-shirt, screen...)
Set the exposure so that the histogram is correctly positioned
Capture your flats
Without touching the camera settings (gain, offset, temperature), turn off light - cap on tube
Capture your dark-flats with exactly the same exposure time
It's fast and costs next to nothing in terms of time.
Software calibration
The principle is simple: your master flat = average of (flats - dark-flats), then normalization (often automatic in software), then application in division on your lights.
Classic mistakes to avoid
Making dark-flats with a different duration from the flats → it's useless
Changing the gain or offset between flats and dark-flats → you're shooting yourself in the foot!
Mix «flats - bias» and «flats - dark-flats» in the same pipeline → inconsistent
Forget that some programs prefer bias if the flats are ultra-short, and dark-flats otherwise.
The simple rule
Flats < 0.1s: bias may suffice (depending on camera)
Flats ≥ 0.2s: make dark-flats
When in doubt: systematic dark-flats - it's clean and reproducible
What this means in concrete terms
Since I've integrated dark-flats into my routine, I get purer flats, much more stable vignetting and dust correction, and above all far fewer processing surprises - no more suspicious gradients, rings or over-corrections. It's an extra little gesture in the field that makes a real difference on screen.
If you've upgraded to a modern CMOS sensor and find that your flats «don't do the job», give it a try. It's worth a try.
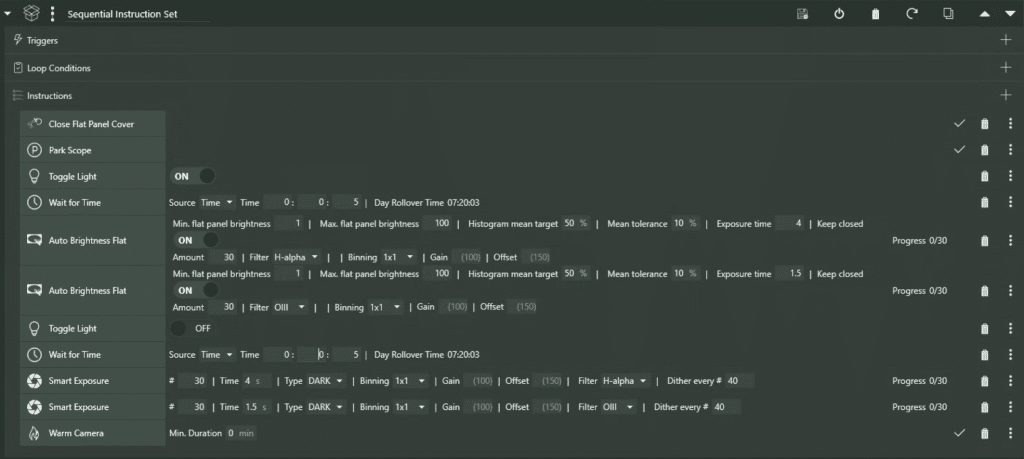
Example of a NINA sequence
Please note:
Sequence in “Sequential” mode” For example: flats then dark flats must be linked in strict sequence. Avoid “Parallel” mode, which can cause unpredictable behavior with the panel/cover.
Fixed exposure time for flats, automatic brightness In this case, we set the exposure (e.g. 4 s in Hα, 1.5 s in OIII) and leave it for a few seconds. Auto Brightness Flat adjust only the panel brightness to reach the target (histogram ~50%). → It makes dark flats simple and perfectly consistent.
A dark flat must match its flat exactly : even duration, gain, offset, binning, temperature. If your flats don't have the same duration depending on the filter, then you make a dark flat per filter (or by duration).
“Toggle Light OFF before dark flats The panel must be switched off to avoid injecting residual light into the dark flats.
Add a pause (Wait) after ON and after OFF 2-5 seconds are enough. This lets the panel stabilize (PWM/driver) and avoids launching dark flats during a transition.
Histogram target ~50% (tolerance 10%) This is a “safe” setting as long as you avoid saturation. The important thing is not to be exactly to 50%, but to be stable and unsaturated.
Don't touch anything between lights and flats ideally the same focus, the same rotation, the same optical train. The flats correct the actual state of the system; if you change something, you change the correction “map”.
To provide the best experiences, we use technologies such as cookies to store and/or access device information. Consenting to these technologies will allow us to process data such as browsing behavior or unique IDs on this site. Failure to consent or withdrawal of consent may adversely affect certain features and functions.
Functional
Always active
Storage or technical access is strictly necessary for the legitimate purpose of enabling the use of a specific service explicitly requested by the subscriber or user, or for the sole purpose of transmitting a communication over an electronic communications network.
Preferences
Storage or technical access is necessary for the legitimate purpose of storing preferences not requested by the subscriber or user.
Statistics
Storage or technical access used exclusively for statistical purposes.Storage or technical access which is used exclusively for anonymous statistical purposes. In the absence of a subpoena, voluntary compliance by your Internet service provider or additional third-party records, information stored or retrieved for this sole purpose generally cannot be used to identify you.
Marketing
Storage or technical access is necessary to create user profiles in order to send advertisements, or to track the user on a website or on several websites with similar marketing purposes.